Showing posts with label Textile Design. Show all posts

Monday, May 26, 2014

A Report on Surtex and National Stationery Show 2014

I'm bidding a fond farewell to New York City
and heading home with my head packed with images
from the National Stationery Show
and Surtex.

Like this early evening view from my hotel window:


The Shows were beautifully presented.
Hundreds of Exhibitors and throngs of Buyers
created a great upbeat vibe throughout the Javits Center.

The artwork presented was beautiful.

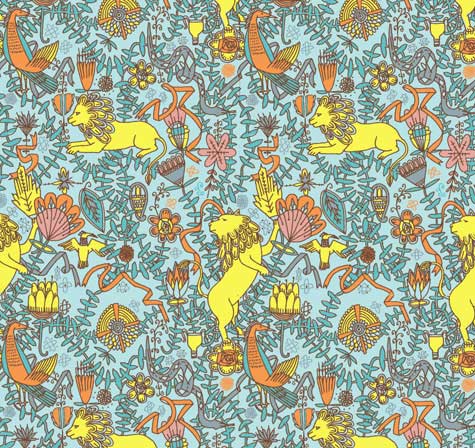
Here is a tiny sampling of what I saw - all images from the artists.
Artwork of Laura Lobdell
Artwork of Sandra Jacobs


Artwork of Diane Kappa


Orange, Dusky Pink, Emerald Green, Blues, Mustard Yellow
and pops of Orchid in shades from Plum to Lavender
were the Colors of the Show.

Cactus and Succulents, cute little Forest Creatures, Vintage Kitchenware,
Paisleys, Plants in Pots, and of course lush Florals
were everywhere.  Tropical motifs, including Flamingos 
were also widely represented.
Lighthouses, Whales, Anchors and Beach Scenes 
caught my eye in some booths,
and of course there were the Seasonal workhorse motifs 
in many booths.

It was a virtual Tidal Wave of art.

By far and away, the National Stationery Show had the largest crowds and the most exhibitors, including a new section of Gifts and Creative & Lifestyle Arts
and another new section for Etsy Wholesalers.

In addition to the lovely booths offering Stationery and other Paper Goods,
there were booths displaying equipment to be used in the creation of all this lovely stuff.


Waste Not Paper was packed with buyers - both retailers and artists.

Janome had a huge booth set up with embroidering machines.
There were paper scoring machines, corner rounders, and foil finishing equipment services.
Software for personalized stationery and Hot Stamping services.

AccuCut had a booth that was hard to get into - they doing a booming business selling their Stationery Die Cutting Machine, the GrandeMARK Roller.
Image courtesy Traci Ambrust of AccuCut...the night before opening.

I jostled my way through numerous paper and stock booths,
looked over the Scotch Brand booth, 
and visited The Gift It section.

Perhaps the most amazing booth was the Hewlett Packard presentation,
where they had latex printers displayed that would print on almost any substrate,
up to Billboard Size!

Bottom line, this is the best Market I've ever attended to bring artists, artisans, agents, equipment and buyers together.

If you are an artist wanting to sell your artwork for application, do yourself a favor
and start saving up now for Surtex 2015 to at least walk the show.
If you have a small business in Stationery, Embroidery, or other hand made product,
the same goes for you.

It is truly worth the price of admission.

Tuesday, May 22, 2012

Surtex 2012 and The National Stationery Show - Without Me

Last year, I went to New York and walked the Surtex 2011 Show.  Along with the National Stationery Show, which runs concurrently, all in the Javits Center.  I so wanted to get into the Surface Design business, and knew that if I was going to do it, Surtex may be the best way to get myself on the radar screen. 


This enormous surface design Trade Show is almost overwhelming in visual texture and artistic talent.  After deciding that not only was I not ready to exhibit my surface designs amongst such power, I also decided at the last minute that I wasn't going to go walk the 2012 show either.  I simply needed to sit down and get back to work.

So I did.

I knew that the best way to put myself into the real world of surface design was to start submitting artwork again, and turn up the pressure by entering design contests with deadlines and rules - like predetermined palettes and subject matter.  The best place to do that is at Spoonflower - they work very hard on their weekly contests.

My Groovy Kitchen Collection, shown above, came from a Palette Restricted competition with a subject matter of Retro, Kitchen Related.  Didn't take long to figure out the palette we were given was from the 1970's...almost straight out of Judy Chicago's Dinner Party opening banners!

Here's another new collection that sprang from the subject matter of Motorcycles - which had to be included or be the starting point of the design:


I was a little worried by the palette I had selected, until I opened one of my favorite blogs this morning - The Adventures of Tartanscot, written by Scott Meacham Wood, and saw these images:


So there you go.  I'm remembering now that when you are in your studio, you have to jump into a swiftly moving river and not fight the current.  Once you do that, you wind up at a place not even on the map.

Which is Exactly Where I Want To Be!

I'm off to do my sit-ups.  Have a Lovely Day...

Monday, August 1, 2011

Adobe Illustrator CS5 Live Trace

Now that the Snapping Turtle Saga is (hopefully) over, I can get back to work on Adobe Illustrator CS5.  The tutor, Jay Montgomery from WyzAnt came on Friday, and we covered the Live Trace function.  He was great!

Basically, Live Trace "traces" a raster image - a raster image is a photograph, (the Flower Photos from Colorado!) or a graphic created in Photoshop - in preparation for turning it into a vector image.  The resulting line of the trace is called a Path, with hundreds of little anchor points along the way.  In order to turn the raster image (groups of thousands of little colored squares) into one or more flat planes of color which have  numerical values which can be blown up to the size of a building,  Illustrator "Traces" the image and starts you down the Path to simplify the image and turn it into planes of solid color.

I won't run through the steps to get here - there are literally Hundreds of tutorials on the web about how to use Live Trace -  but essentially, this is the command center in Illustrator that begins the process:


Why do this?  Because if you were to take a photo (a Raster Image) and try to enlarge it to a Building Sized Image, it would get all Pixelated - blurred and confused with millions of little squares trying to be much bigger than they can be.

And this isn't even Near Building size - see what I mean?
 
You can simplify the image in Photoshop before you "Place" it into the Illustrator CS5 program by cleaning up the Noise, separating parts of the image so that you have individual components that make up the whole, and making sure to save it as a PSD image. 

Now, here is the most beneficial thing to come out of the Friday session - there is a tool in Illustrator CS5 that is so exciting, I can hardly wait to get proficient on it.  You see, when I upload a design file to either Spoonflower Fabric Printing or Adaptive Textiles Fabric Printing, to get the best color match I need to use LAB color. 

The color blankets are from Adaptive Textiles, the fabric swatch of Fishing Coral is from Spoonflower.


Since I normally work in sRGB mode (because that is the color mode the monitor is), I've had to calibrate the monitor to the printer as best I can and then print it out in CMYK color.  Because that's the color mode the printer is.  Then spend hours and hours trying to match the color on the hard copy to the color blankets that Adaptive Textiles sent to me.  Sometimes Days.

Well.  Illustrator CS5 has a little color wheel icon parked right in the upper toolbar that is Powerful, Powerful, Powerful!  When you select your artwork, you can click on the icon:

And it opens this function:


Now, here's the good part. I can change the color mode while I am in the Recolor Artwork Screen to LAB color mode.

There is a tiny little icon that lets you change the color mode to LAB.
And then, all I have to do is plug in the numbers from the Adaptive Textiles color blanket for the color I want, and BOOM!  I'm done.

How cool is that?  I mean, how COOL is that?  I'm off to practice now!

Friday, July 29, 2011

Coffee Design Fabric Contest Open for Voting

Just a quickie - thanks so much to all of you who voted for my "Fishie Coral"  entry in the  Spoonflower Fabrics  design contest in June: 


Although I wasn't in the top 10, I was thrilled to place in the top 50 - not bad for a first time entry - thanks to all of you!

Now the Coffee Design fabric contest is open for voting - the rules were harder, as you could only use three colors - here's my entry:

A Cuppa Caffe'


You can view all the designs from the many talented fabric artists out there by clicking on this link:  Vote for Coffee Design Favorite.

The Coffee Fabric Design Contest ends August 4, so I hope you'll cruise on over and vote!  Next subject in the Fabric Design Contest......SHARKS!  Now THAT will be a toughie, but I'm on it!

Sunday, July 10, 2011

Beach Cottage Bookbinding Studio

While we were waiting for Baby Blakely to arrive, I have been busy figuring out how to use all my new Bookbinding tools, and I think I finally have a good start on the process.  

The Beach Cottage studio is a mess, with Book Parts laying around everwhere:

These are some of the patterns I am going to make fabric out of...works for Books, too!


My first Book was okay, but not exactly even from front to back cover:

This Mango image is meant to be printed on Linen and framed under glass...time to get it done, now that I see it again.  It took me weeks and weeks to create this image - and I just forgot about it!

Living at the Beach, I'm partial to Coastal and underwater images...and my all-time favorites are images of Coral Branches and Sea Fans.  So I designed the following image over a year ago, and it was the first one I experimented with by having Spoonflower print it up for me:

Gluing up the Book Covers is agonizing.  Pure T.   But I am pleased with the finished look.

Once I finally got happy with the front and back Book Covers, I was off to the races, and started assembling:

Don't you think this would make beautiful fabric for a Lula Belle Handbag??  Or Wallpaper for a Beach Cottage accent wall??  Or how about Gift Wrap??  I started with the Coral image, then put it in repeat with other components to make the pages.  You can visit my post on making a Pattern Repeat to see how to do this.

The inside pages are lined and blank, meant for journaling or note jots:


And, here is the back cover:

All Done!


Next up, the Pomegranate Book - but that will be after I go see Baby Blakely again.


I think it's time to get the sewing machine cranked up and Sew "Stuff" to these Book Covers; and layer them up - what do you think?

Monday, July 4, 2011

How to Design a Half-Brick Repeat with Photoshop

Here is a quick tutorial to follow up on my post on how to create a Pattern Repeat.  You can use Photoshop (of course!) to do all the work for you after you've created your image.  Here's how.

Design an image - don't let the design go all the way to the edge of your canvas.  Make your image square.  Your image can be a print or painting that you scan into your computer, or something that you create using your computer.  Open it in Photoshop.  Then, to practice and get comfortable with this process, RESIZE your image to something that is fairly quick to handle - say, 500 pixels by 500 pixels at 72 DPI/PPI.  You can get serious later with higher resolution.


I've made this with a lot of Contrasting Colours so that you can see it better, even though the design doesn't make a lot of visual sense.   This image is 500 x 500 pixels.


Now, open a new blank canvas that is 500 x 500 pixels.  Then go to your image canvas, click on the Select Menu, and click "All".  

This selects your entire canvas quickly and accurately.


Go to Edit Menu, and click on Copy.  Move to your blank canvas, and click Edit, then Paste.


Now you have two identical screens, one with your original image, and one with the new canvas and your image layered on top.  

To begin your Half-Brick Repeat, you must double the width of your "New" canvas.  You do this by going from the Image Menu - select Resize, then Canvas Size.  You'll see a screen that shows you the current size of your image (500 x 500 pixels), and a section labeled "New Size".  In that section, make the WIDTH of the canvas exactly double, or 1000 pixels.  Keep the height the same as your original image.  Before you click OK, select the anchor on either the right or the left so that you get a full 500 pixels added to one side of your existing canvas, not 250 on each side.

See the Anchor arrows - this will make sure that the additional width is added to one side.
Now your canvas looks like this:


Duplicate this layer.  You can name it or not - I usually don't because I'm moving too fast!


To "drop" the image by 1/2, go to the Filter menu, choose Other, then "Offset". 


On the Offset Screen, enter the original width of your canvas in the Horizontal block, and half that value in the Vertical block.  This will drop your image by half.

 Now your image looks like this:

Flatten the layer after Offsetting it.
 Now you can fill in the blank areas with anything you want - just don't touch the edges!  Go back and look at How to Design A Pattern Repeat to see how Julia Rothman filled in her design. 

I filled mine in with Doodles and such, just to show you how to fill it out...


After you've filled in your design, be sure to flatten it if necessary, then Select All again, and move to the edit menu and select "Define Pattern From Selection".  Name the pattern the same name as your new file.

Open a new canvas at least twice as large as this pattern - 2000 x 2000 pixels.  This will allow you to see your repeat better.  Select -> All, then Edit-> Fill Selection, using your newly named pattern.  And this is what it looks like!


Now you can adjust your "additions" to make sure they are pleasing to the eye when filling a large expanse, and don't create an obvious line (like mine did up the middle).  Once you do this a couple of times, it will be so easy.  Now, get to designing!

Tuesday, June 28, 2011

How to Design a Pattern Repeat

When I first started designing images that I uploaded to Spoonflower for digital printing, I was centering the images for use on an 18" x 18" pillow.  The images had "White Space" all around them, because they were centered on the pillow, like a framed painting.  That left plenty of room for the seams, trims, and the zipper at the bottom of the pillow.  Then I started fiddling around with putting my images into repeats, with the idea that they could be used for wallpaper or gift wrap.

Spoonflower's in-house software can put your images into various repeats, like this Half Brick repeat shown on a Paul Stuart tie:


This is their Blue Printed Surfer tie.  See how the surfer shifts over on every other row?   That is a simple Half Brick repeat, and is pretty for small objects...or in small doses.  You wouldn't want several yards of 54" wide fabric printed like this, or the image would turn into a ditsy sea of dots.

To get an image to Flow across a large expanse, with no obvious start or finish, you have to use a few tricks.  


There is no defined center when you look at this Waverly fabric called Hidden Reef- it just flows seamlessly from side to side, and also from top to bottom.   Although it looks very complicated to create, it is actually quite simple.

After months of experimentation with Photoshop and their Offset Filter, I came across this straightforward tutorial in how to create a seamless repeat that flows effortlessly.  Julia Rothman shows us how she created this pattern:


Here is the text of Julia's tutorial:


"One of the questions I frequently get emailed is -how do you make a repeat pattern? I thought it would be fun today to do a little tutorial showing you how simple it is even with a very complex drawing. And you don’t even need a computer! (I usually do my repeats on the computer but today I’m doing it the way I was first taught.) Here’s the old fashioned way of making a tile-able design:


On a clean piece of paper draw a design in the middle of your paper without letting any of the drawing touch the edges- this is very important. (I am going to draw lions and vine-y things- an influence from last months visit to the American Folk Art museum in nyc.)


Once you finish the middle space as much as you want you are going to cut your drawing in half- scary I know- but that’s why computers are helpful. Once you have the two pieces flip them and tape your drawing back together. Put the tape on the back of the paper so it doesn’t obstruct your drawing at all later. Also try to tape your drawing back together as perfectly lined up as possible. It’s hard to see that I’ve even taped mine since I’ve lined it up so well. Next you are going to cut your drawing in half again the other way- (yikes!) and flip those pieces and tape them back together. Now your design should be on all the edges only and you have a big middle white space. Now fill this space with the rest of your design. Remember again- do not draw to any of the edges of the paper.

Once you finish filling in all the parts you want to fill in you now have your repeatable tile. You could color this tile and then xerox it many times and line up your design- plaster it on your walls and make wallpaper. I am going to cheat and do the final coloring steps in the computer to finish up my design. I am going to scan my drawing, take it into Adobe Illustrator, color and repeat it there."


I used Julia's tutorial to go to Photoshop and use the Offset Filter to whack my design into quarters, like she did, and then just filled in the center with the whole (original) design.  You could always put something different in there...the sky is the limit!

Now to figure out a half-drop, tileable repeat...any suggestions out there??

LinkWithin

Related Posts Plugin for WordPress, Blogger...