Showing posts with label Half Drop Repeat. Show all posts

Monday, July 4, 2011

How to Design a Half-Brick Repeat with Photoshop

Here is a quick tutorial to follow up on my post on how to create a Pattern Repeat.  You can use Photoshop (of course!) to do all the work for you after you've created your image.  Here's how.

Design an image - don't let the design go all the way to the edge of your canvas.  Make your image square.  Your image can be a print or painting that you scan into your computer, or something that you create using your computer.  Open it in Photoshop.  Then, to practice and get comfortable with this process, RESIZE your image to something that is fairly quick to handle - say, 500 pixels by 500 pixels at 72 DPI/PPI.  You can get serious later with higher resolution.


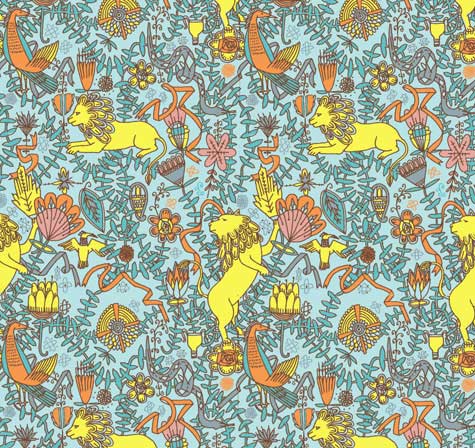
I've made this with a lot of Contrasting Colours so that you can see it better, even though the design doesn't make a lot of visual sense.   This image is 500 x 500 pixels.


Now, open a new blank canvas that is 500 x 500 pixels.  Then go to your image canvas, click on the Select Menu, and click "All".  

This selects your entire canvas quickly and accurately.


Go to Edit Menu, and click on Copy.  Move to your blank canvas, and click Edit, then Paste.


Now you have two identical screens, one with your original image, and one with the new canvas and your image layered on top.  

To begin your Half-Brick Repeat, you must double the width of your "New" canvas.  You do this by going from the Image Menu - select Resize, then Canvas Size.  You'll see a screen that shows you the current size of your image (500 x 500 pixels), and a section labeled "New Size".  In that section, make the WIDTH of the canvas exactly double, or 1000 pixels.  Keep the height the same as your original image.  Before you click OK, select the anchor on either the right or the left so that you get a full 500 pixels added to one side of your existing canvas, not 250 on each side.

See the Anchor arrows - this will make sure that the additional width is added to one side.
Now your canvas looks like this:


Duplicate this layer.  You can name it or not - I usually don't because I'm moving too fast!


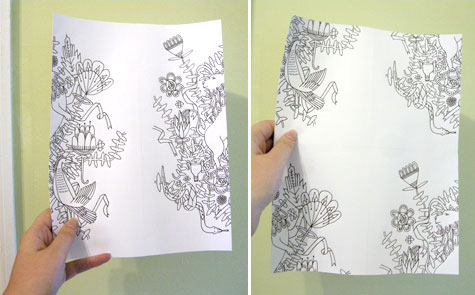
To "drop" the image by 1/2, go to the Filter menu, choose Other, then "Offset". 


On the Offset Screen, enter the original width of your canvas in the Horizontal block, and half that value in the Vertical block.  This will drop your image by half.

 Now your image looks like this:

Flatten the layer after Offsetting it.
 Now you can fill in the blank areas with anything you want - just don't touch the edges!  Go back and look at How to Design A Pattern Repeat to see how Julia Rothman filled in her design. 

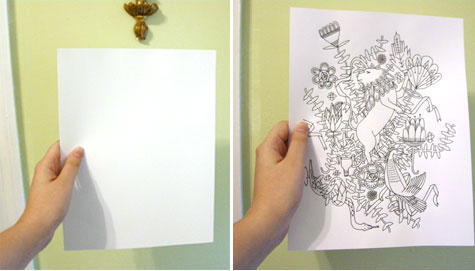
I filled mine in with Doodles and such, just to show you how to fill it out...


After you've filled in your design, be sure to flatten it if necessary, then Select All again, and move to the edit menu and select "Define Pattern From Selection".  Name the pattern the same name as your new file.

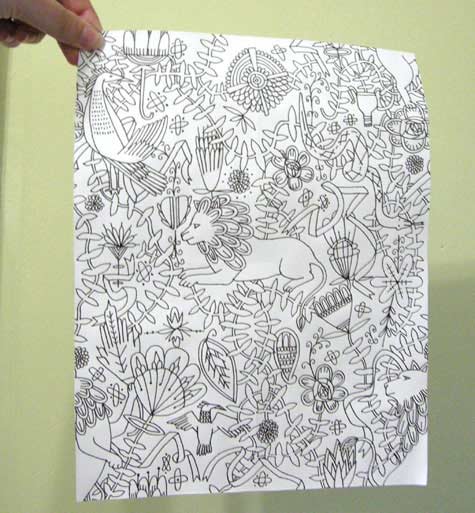
Open a new canvas at least twice as large as this pattern - 2000 x 2000 pixels.  This will allow you to see your repeat better.  Select -> All, then Edit-> Fill Selection, using your newly named pattern.  And this is what it looks like!


Now you can adjust your "additions" to make sure they are pleasing to the eye when filling a large expanse, and don't create an obvious line (like mine did up the middle).  Once you do this a couple of times, it will be so easy.  Now, get to designing!

Tuesday, June 28, 2011

How to Design a Pattern Repeat

When I first started designing images that I uploaded to Spoonflower for digital printing, I was centering the images for use on an 18" x 18" pillow.  The images had "White Space" all around them, because they were centered on the pillow, like a framed painting.  That left plenty of room for the seams, trims, and the zipper at the bottom of the pillow.  Then I started fiddling around with putting my images into repeats, with the idea that they could be used for wallpaper or gift wrap.

Spoonflower's in-house software can put your images into various repeats, like this Half Brick repeat shown on a Paul Stuart tie:


This is their Blue Printed Surfer tie.  See how the surfer shifts over on every other row?   That is a simple Half Brick repeat, and is pretty for small objects...or in small doses.  You wouldn't want several yards of 54" wide fabric printed like this, or the image would turn into a ditsy sea of dots.

To get an image to Flow across a large expanse, with no obvious start or finish, you have to use a few tricks.  


There is no defined center when you look at this Waverly fabric called Hidden Reef- it just flows seamlessly from side to side, and also from top to bottom.   Although it looks very complicated to create, it is actually quite simple.

After months of experimentation with Photoshop and their Offset Filter, I came across this straightforward tutorial in how to create a seamless repeat that flows effortlessly.  Julia Rothman shows us how she created this pattern:


Here is the text of Julia's tutorial:


"One of the questions I frequently get emailed is -how do you make a repeat pattern? I thought it would be fun today to do a little tutorial showing you how simple it is even with a very complex drawing. And you don’t even need a computer! (I usually do my repeats on the computer but today I’m doing it the way I was first taught.) Here’s the old fashioned way of making a tile-able design:


On a clean piece of paper draw a design in the middle of your paper without letting any of the drawing touch the edges- this is very important. (I am going to draw lions and vine-y things- an influence from last months visit to the American Folk Art museum in nyc.)


Once you finish the middle space as much as you want you are going to cut your drawing in half- scary I know- but that’s why computers are helpful. Once you have the two pieces flip them and tape your drawing back together. Put the tape on the back of the paper so it doesn’t obstruct your drawing at all later. Also try to tape your drawing back together as perfectly lined up as possible. It’s hard to see that I’ve even taped mine since I’ve lined it up so well. Next you are going to cut your drawing in half again the other way- (yikes!) and flip those pieces and tape them back together. Now your design should be on all the edges only and you have a big middle white space. Now fill this space with the rest of your design. Remember again- do not draw to any of the edges of the paper.

Once you finish filling in all the parts you want to fill in you now have your repeatable tile. You could color this tile and then xerox it many times and line up your design- plaster it on your walls and make wallpaper. I am going to cheat and do the final coloring steps in the computer to finish up my design. I am going to scan my drawing, take it into Adobe Illustrator, color and repeat it there."


I used Julia's tutorial to go to Photoshop and use the Offset Filter to whack my design into quarters, like she did, and then just filled in the center with the whole (original) design.  You could always put something different in there...the sky is the limit!

Now to figure out a half-drop, tileable repeat...any suggestions out there??

LinkWithin

Related Posts Plugin for WordPress, Blogger...