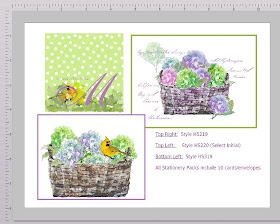
I wanted to show you how easy it is to lay out a custom album with this software, so I quickly pulled together a catalog from some of my stationery designs:
And here is how it did it, in less than 30 minutes, using the software in the Custom Mode:
Choosing the Custom Mode from the opening page, through choosing the background for the front cover, took less than two minutes...
Now, on to the layout.
I went to my Art Files, and chose one of my Stationery Frames and an image for the Cover:
Then just clicked on the "Add T" button for text, picked the font and size, and then the Paint Bucket button to pick my own font color...here's a screen shot of me doing that on the second page:
You can pick one of their offered colors, and then get REALLY custom by going to their RGB tab. See the little sliders? When you slide them left or right, your color changes, and you can see the resulting hue right underneath in the Sample Text area. If you love what you've created, click Add To Favorites so you can go back to it, over and over.
Then I just kept adding images and moving them around until I liked the layout. Added text boxes, edited those a few times, and Boom! I had a catalog!
This is now ready to go to the printer, or I can print it here in my studio, or upload it to My Memories for them to print and bind. How Super Easy is That for pulling together a catalog of your work??
To enter the giveaway for the free software, just leave me a comment. And be sure to go over to the
My Memories website to browse through their products.


Sounds so easy. Your designs are fabulous. Thanks for sharing.
ReplyDeleteThanks so much for your feedback - and for the compliments!
ReplyDelete